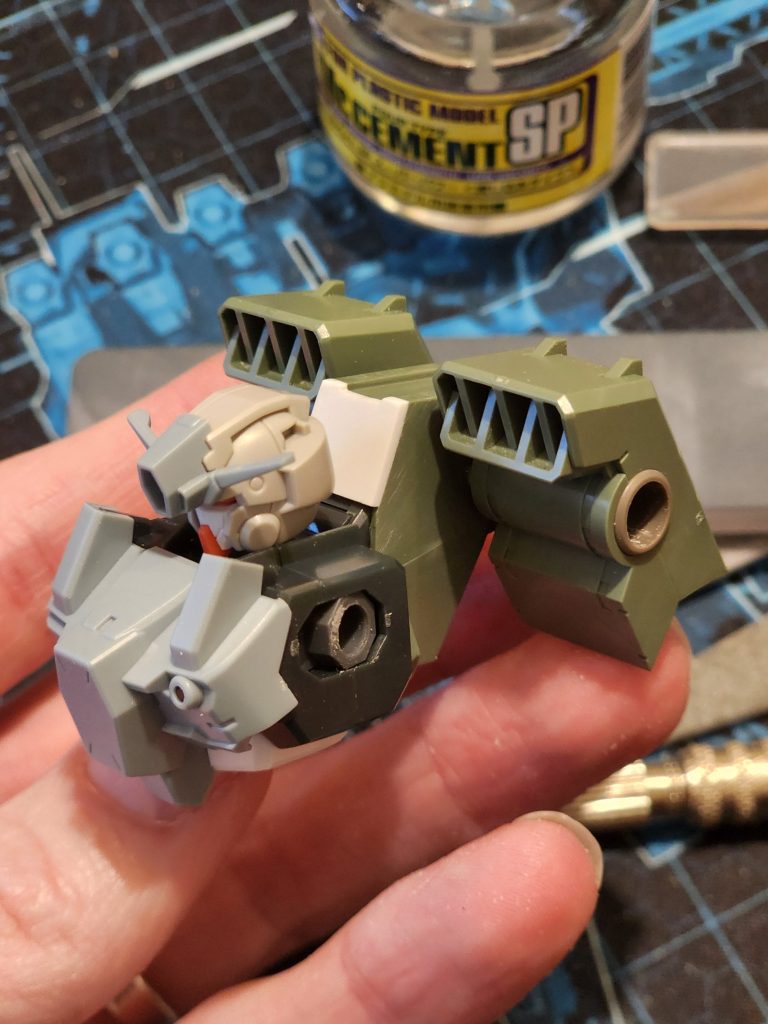
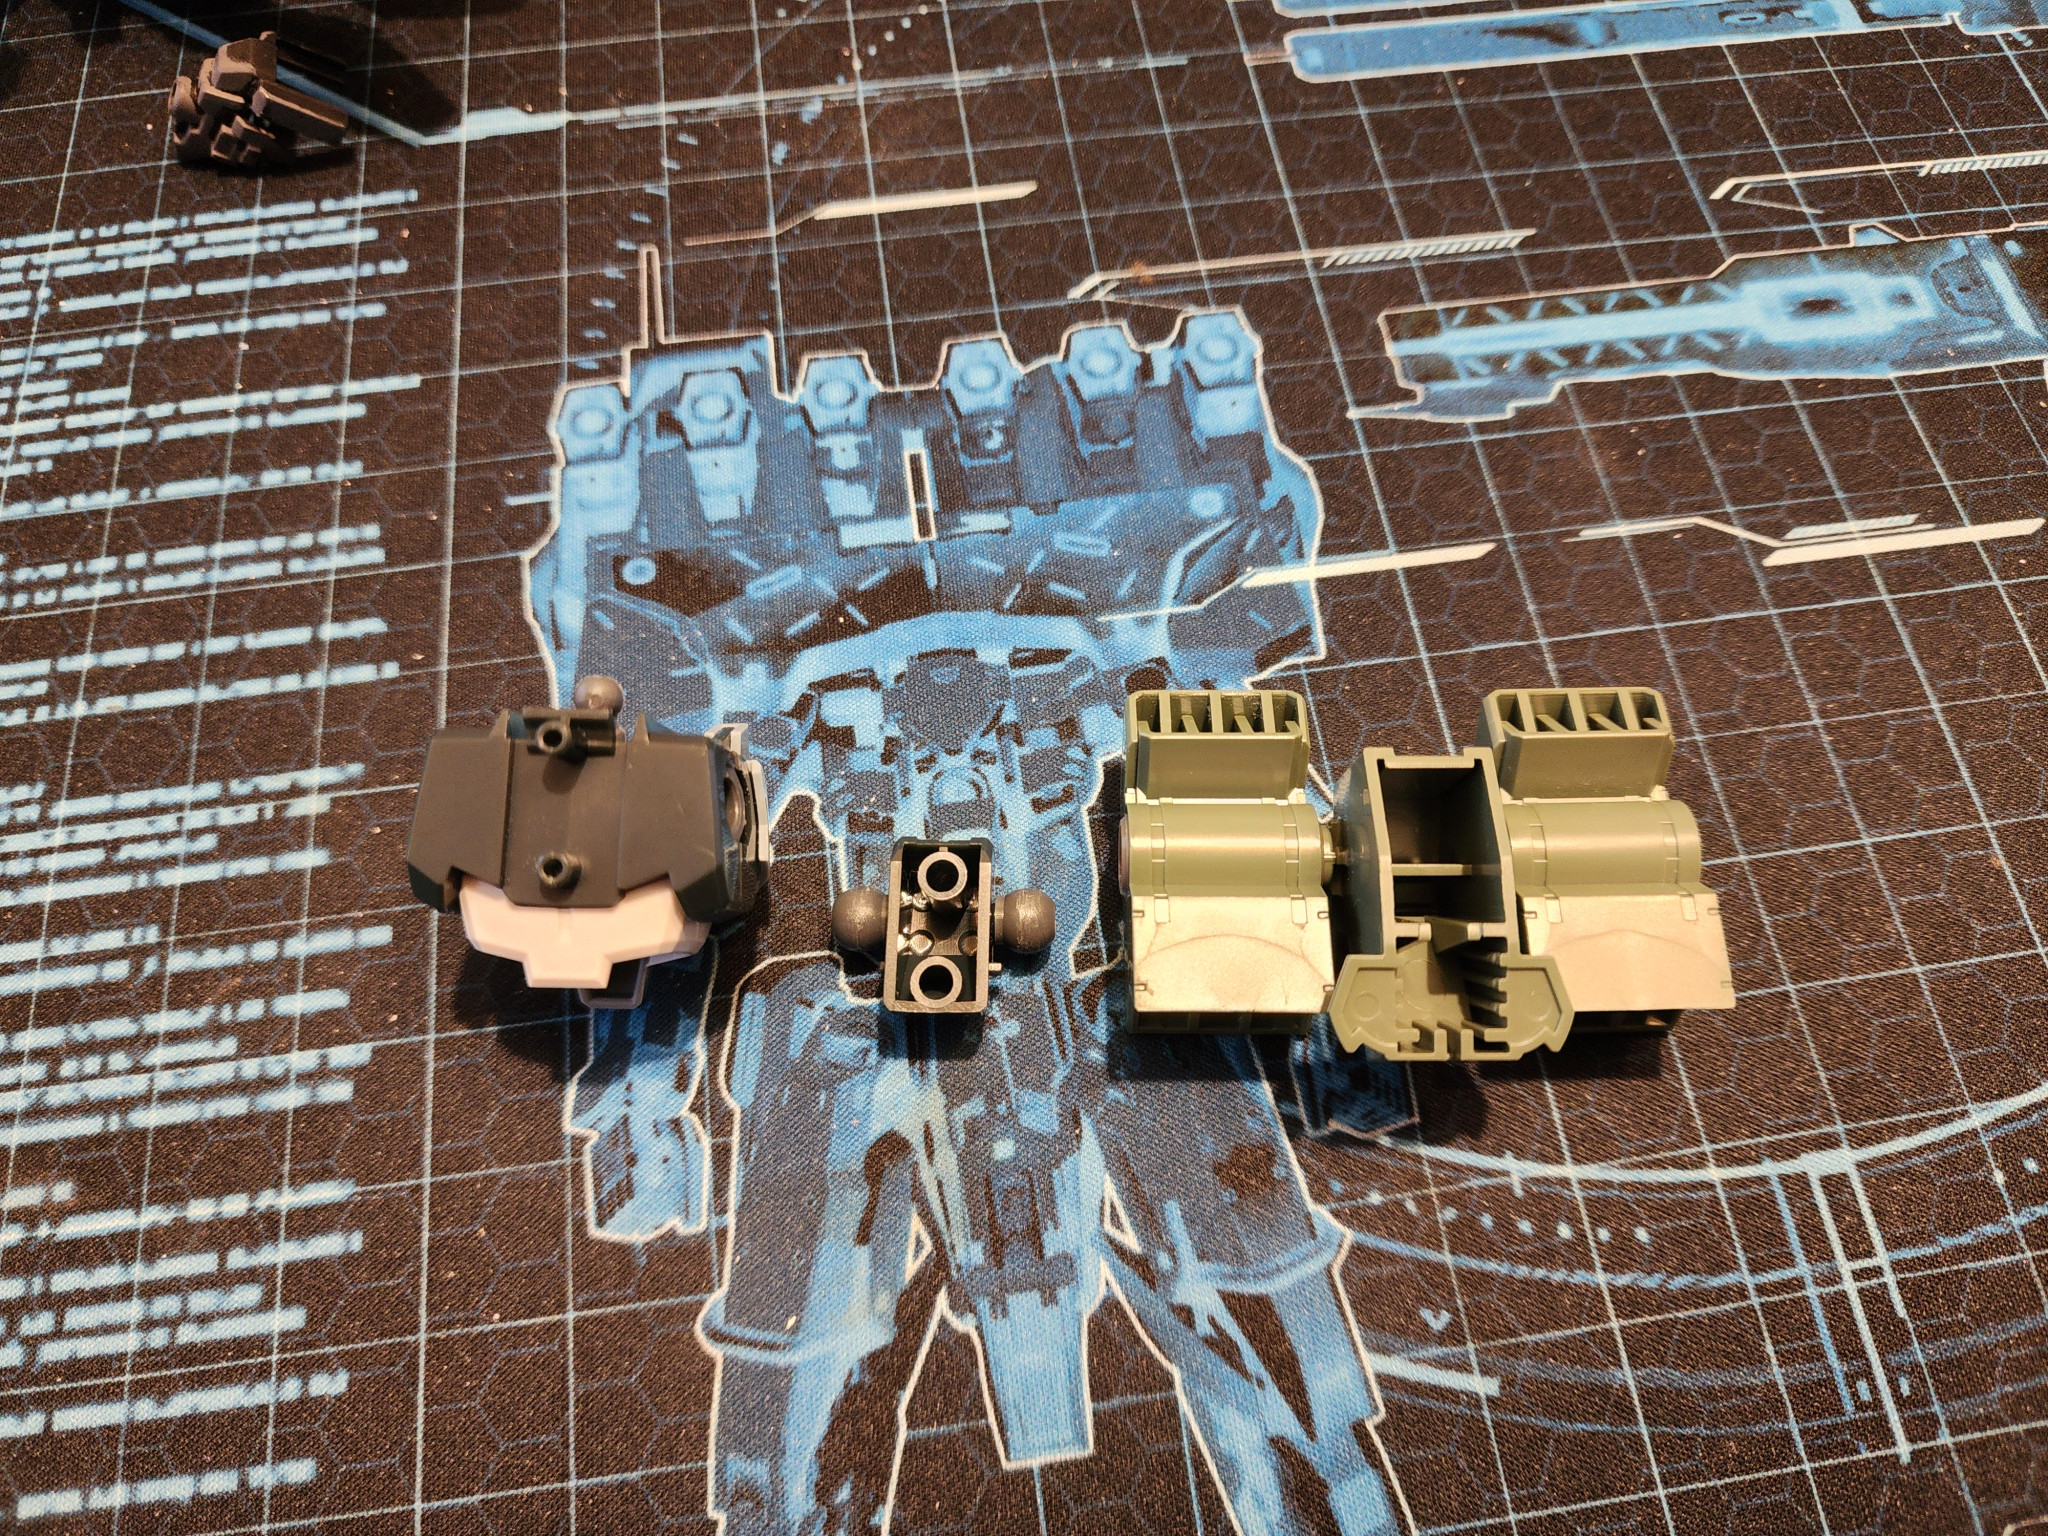
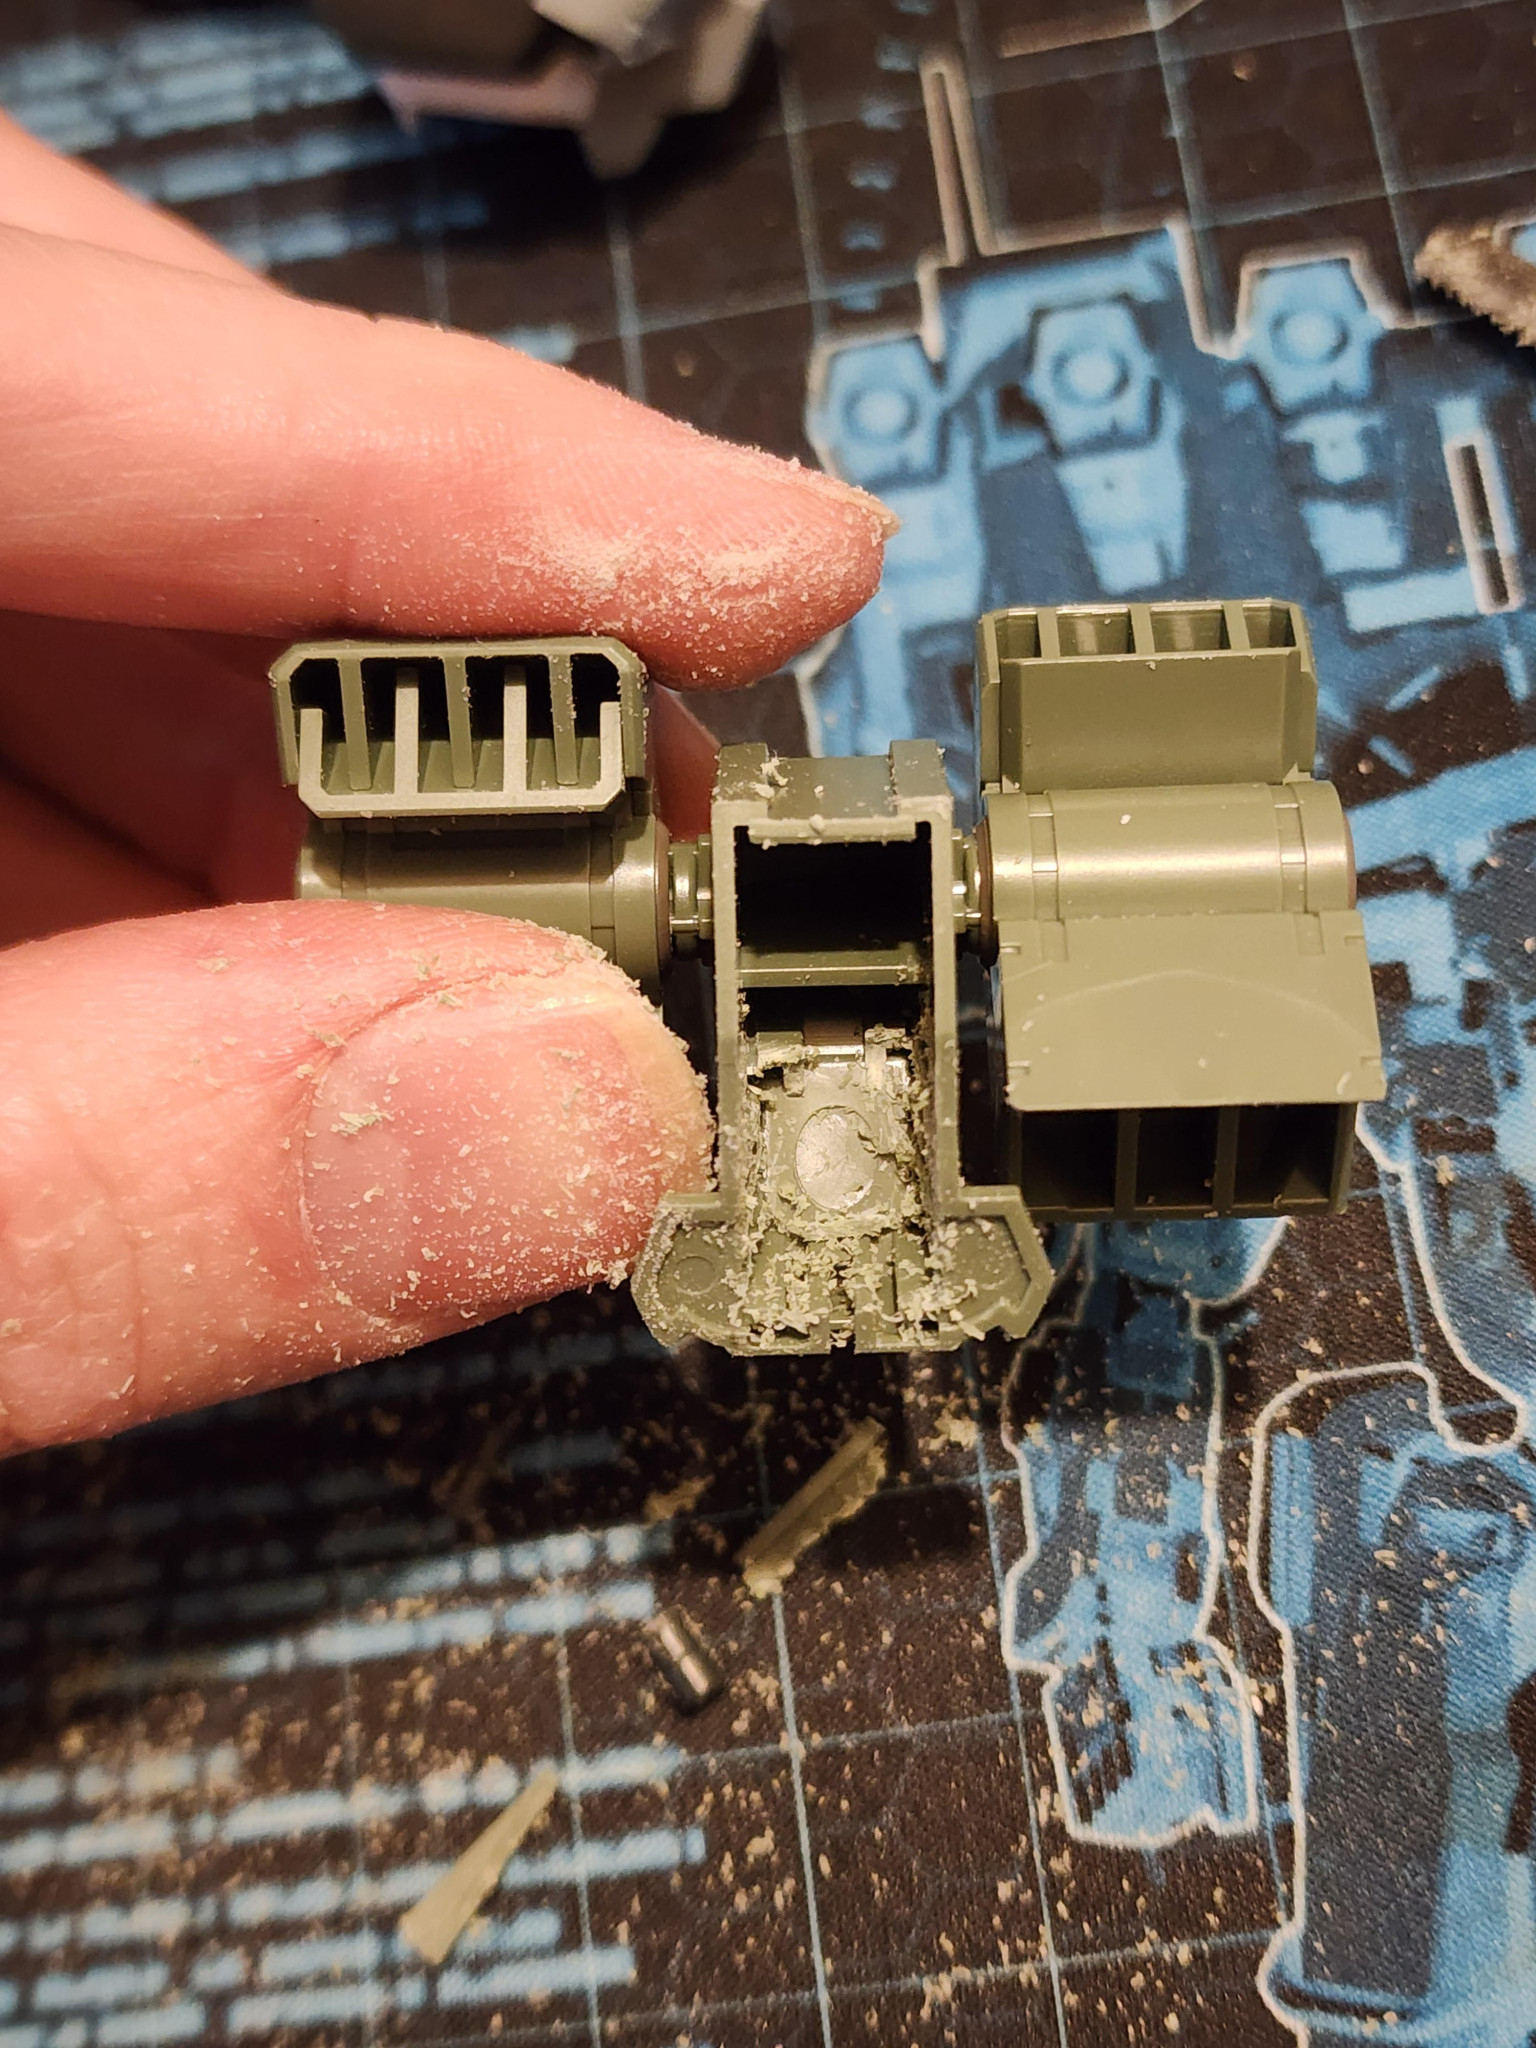
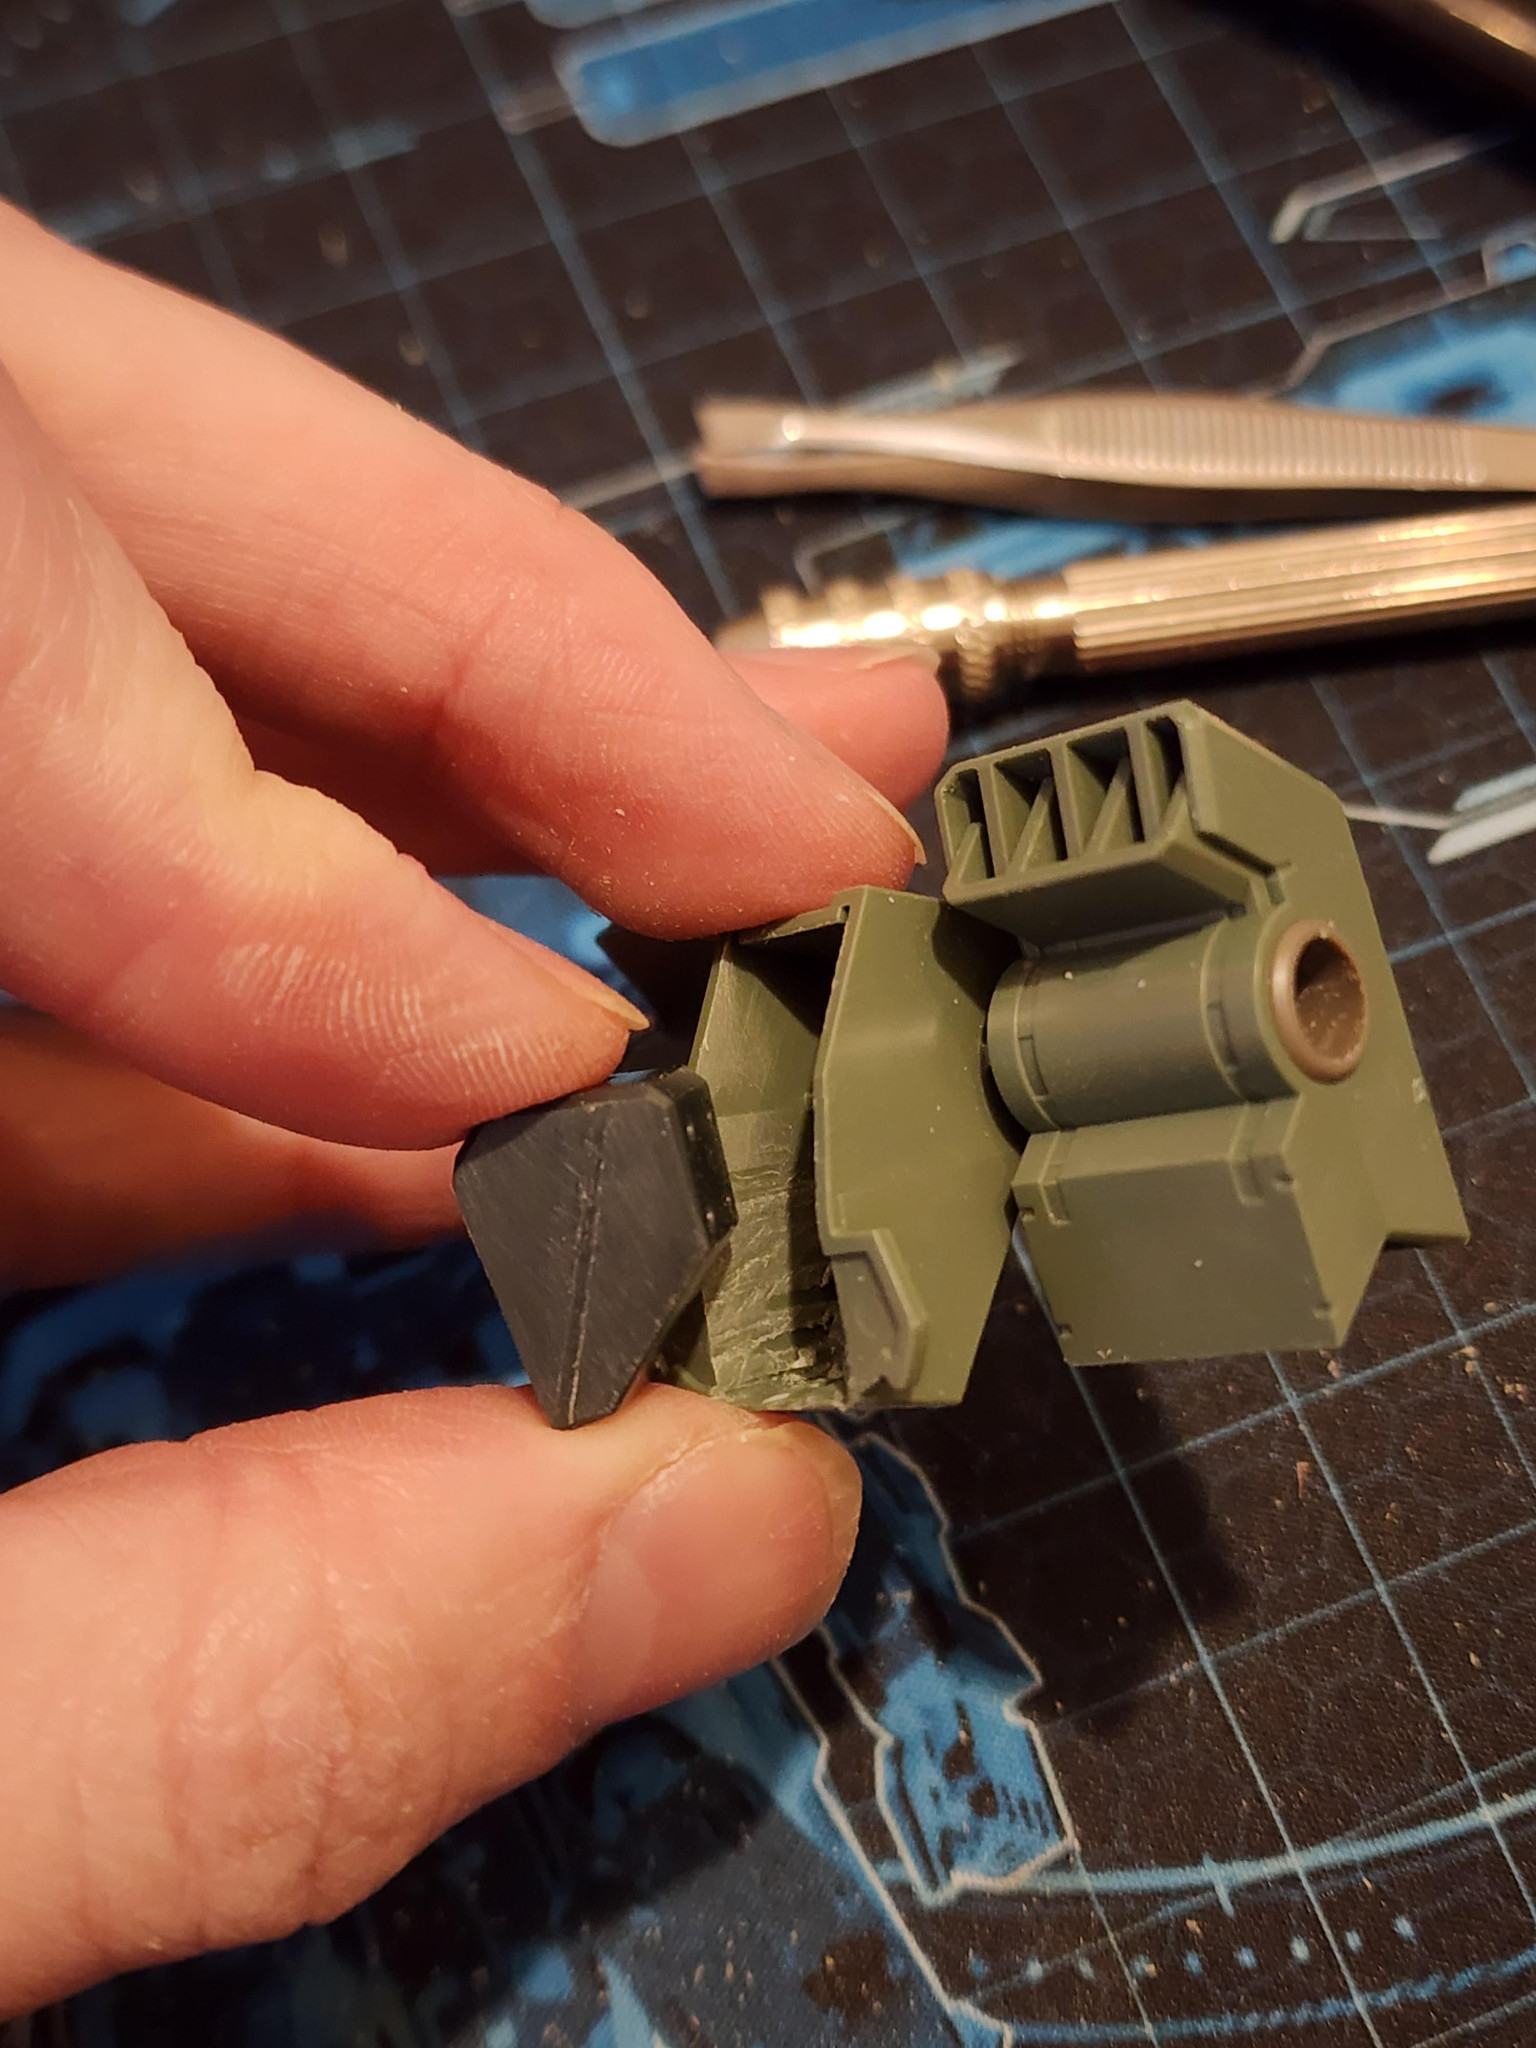
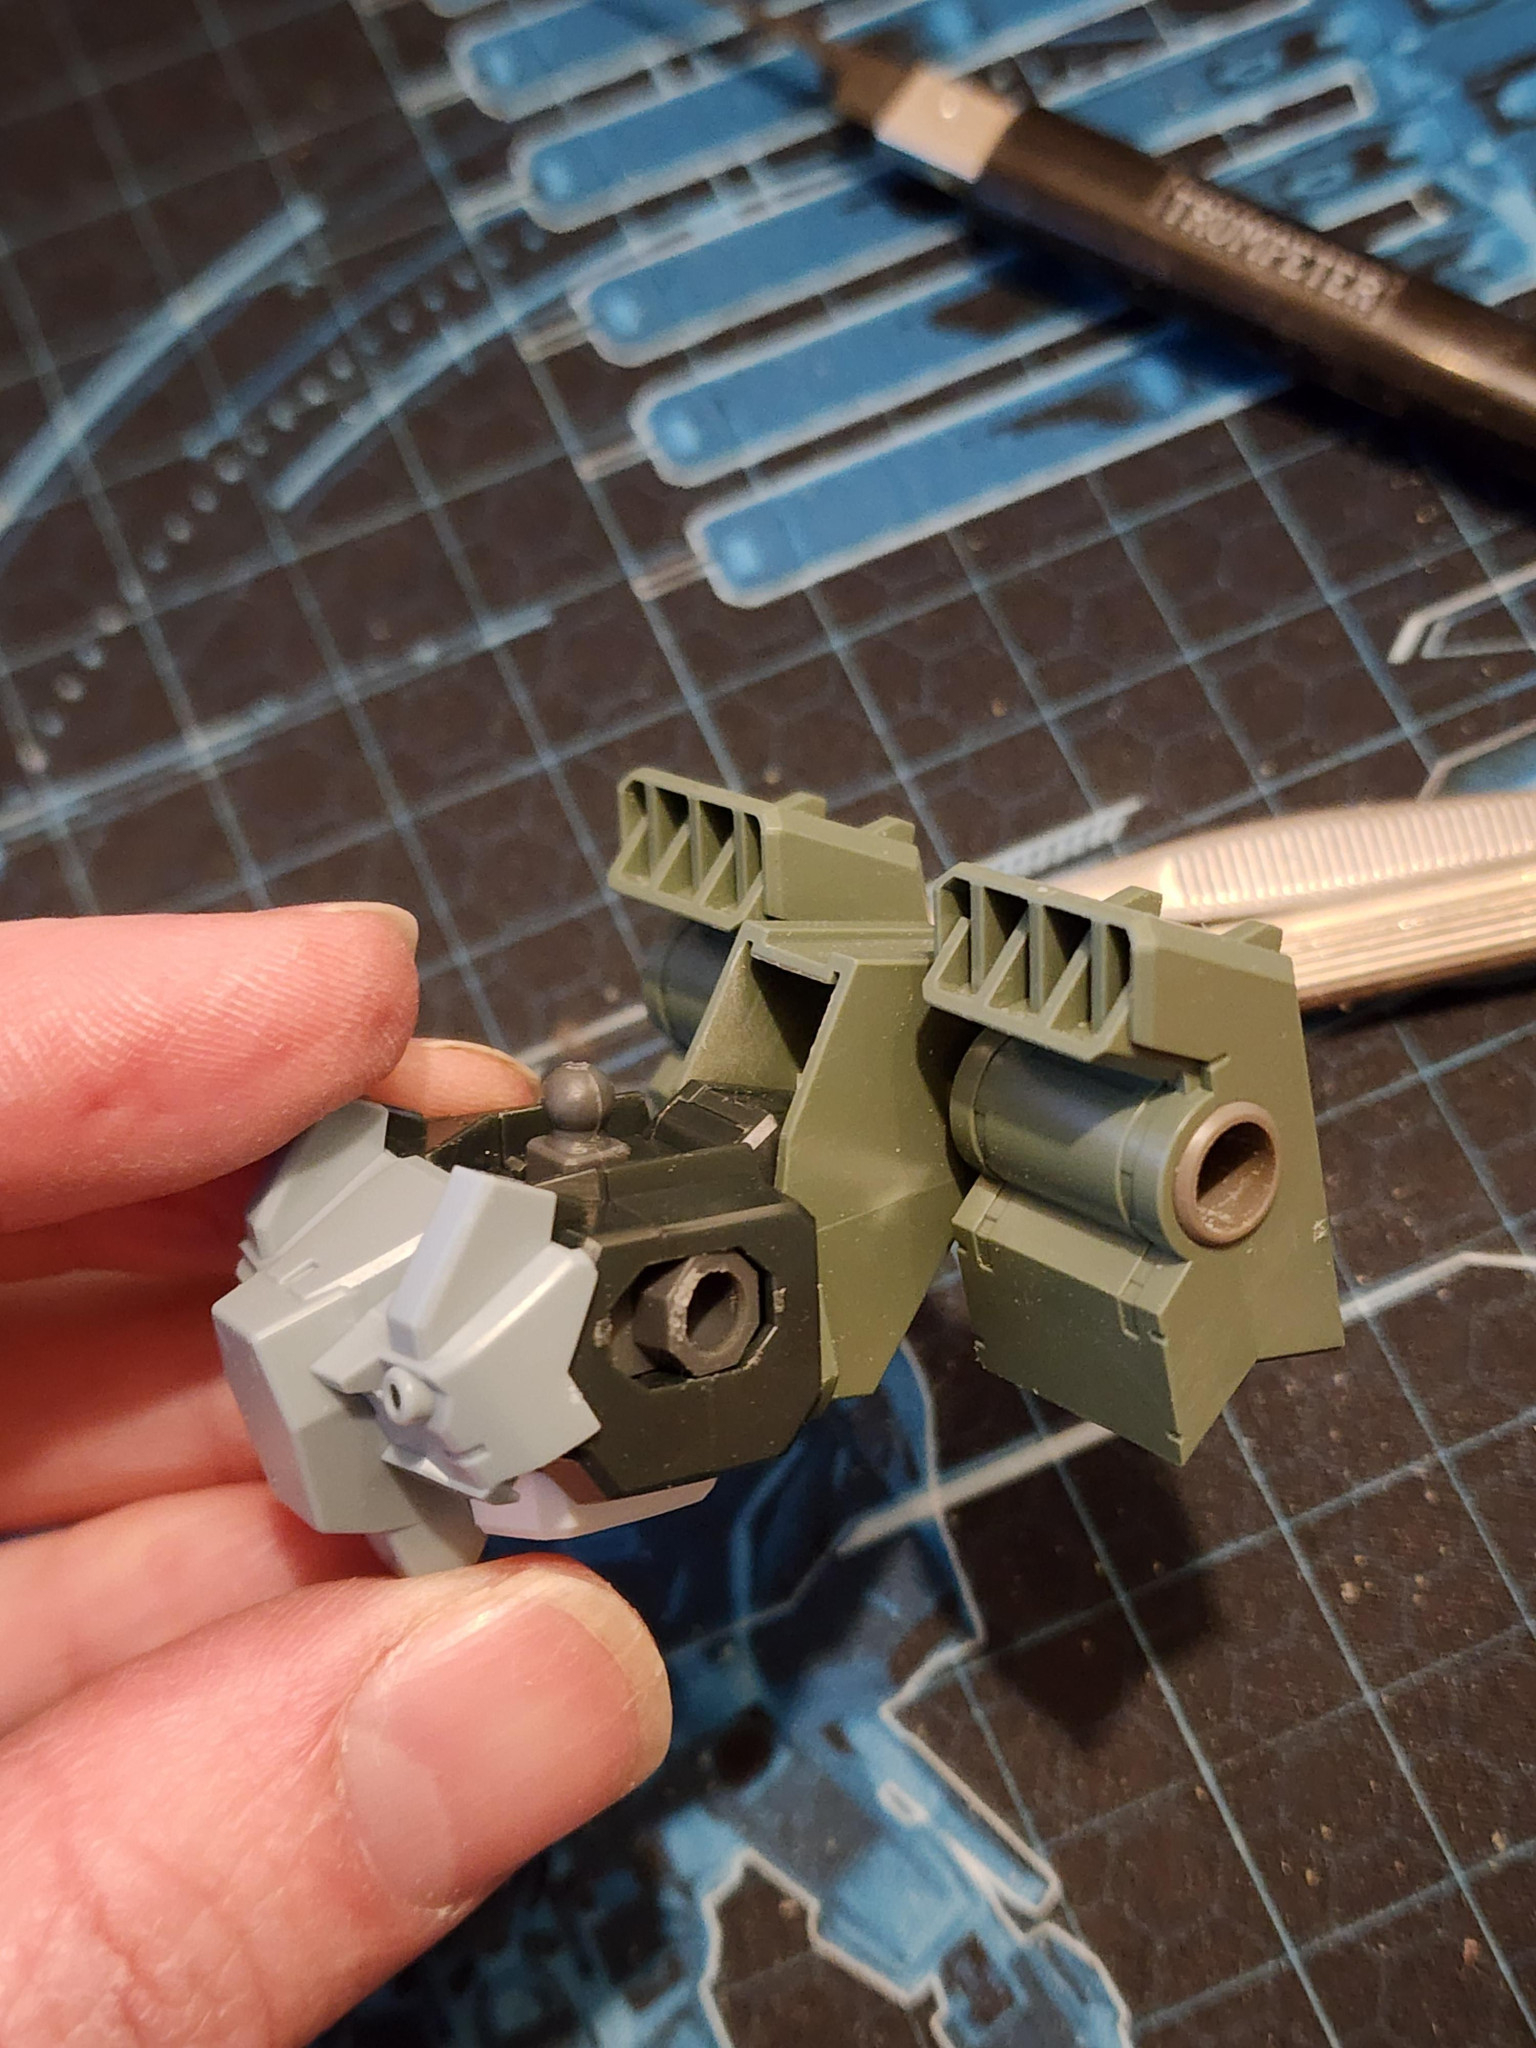
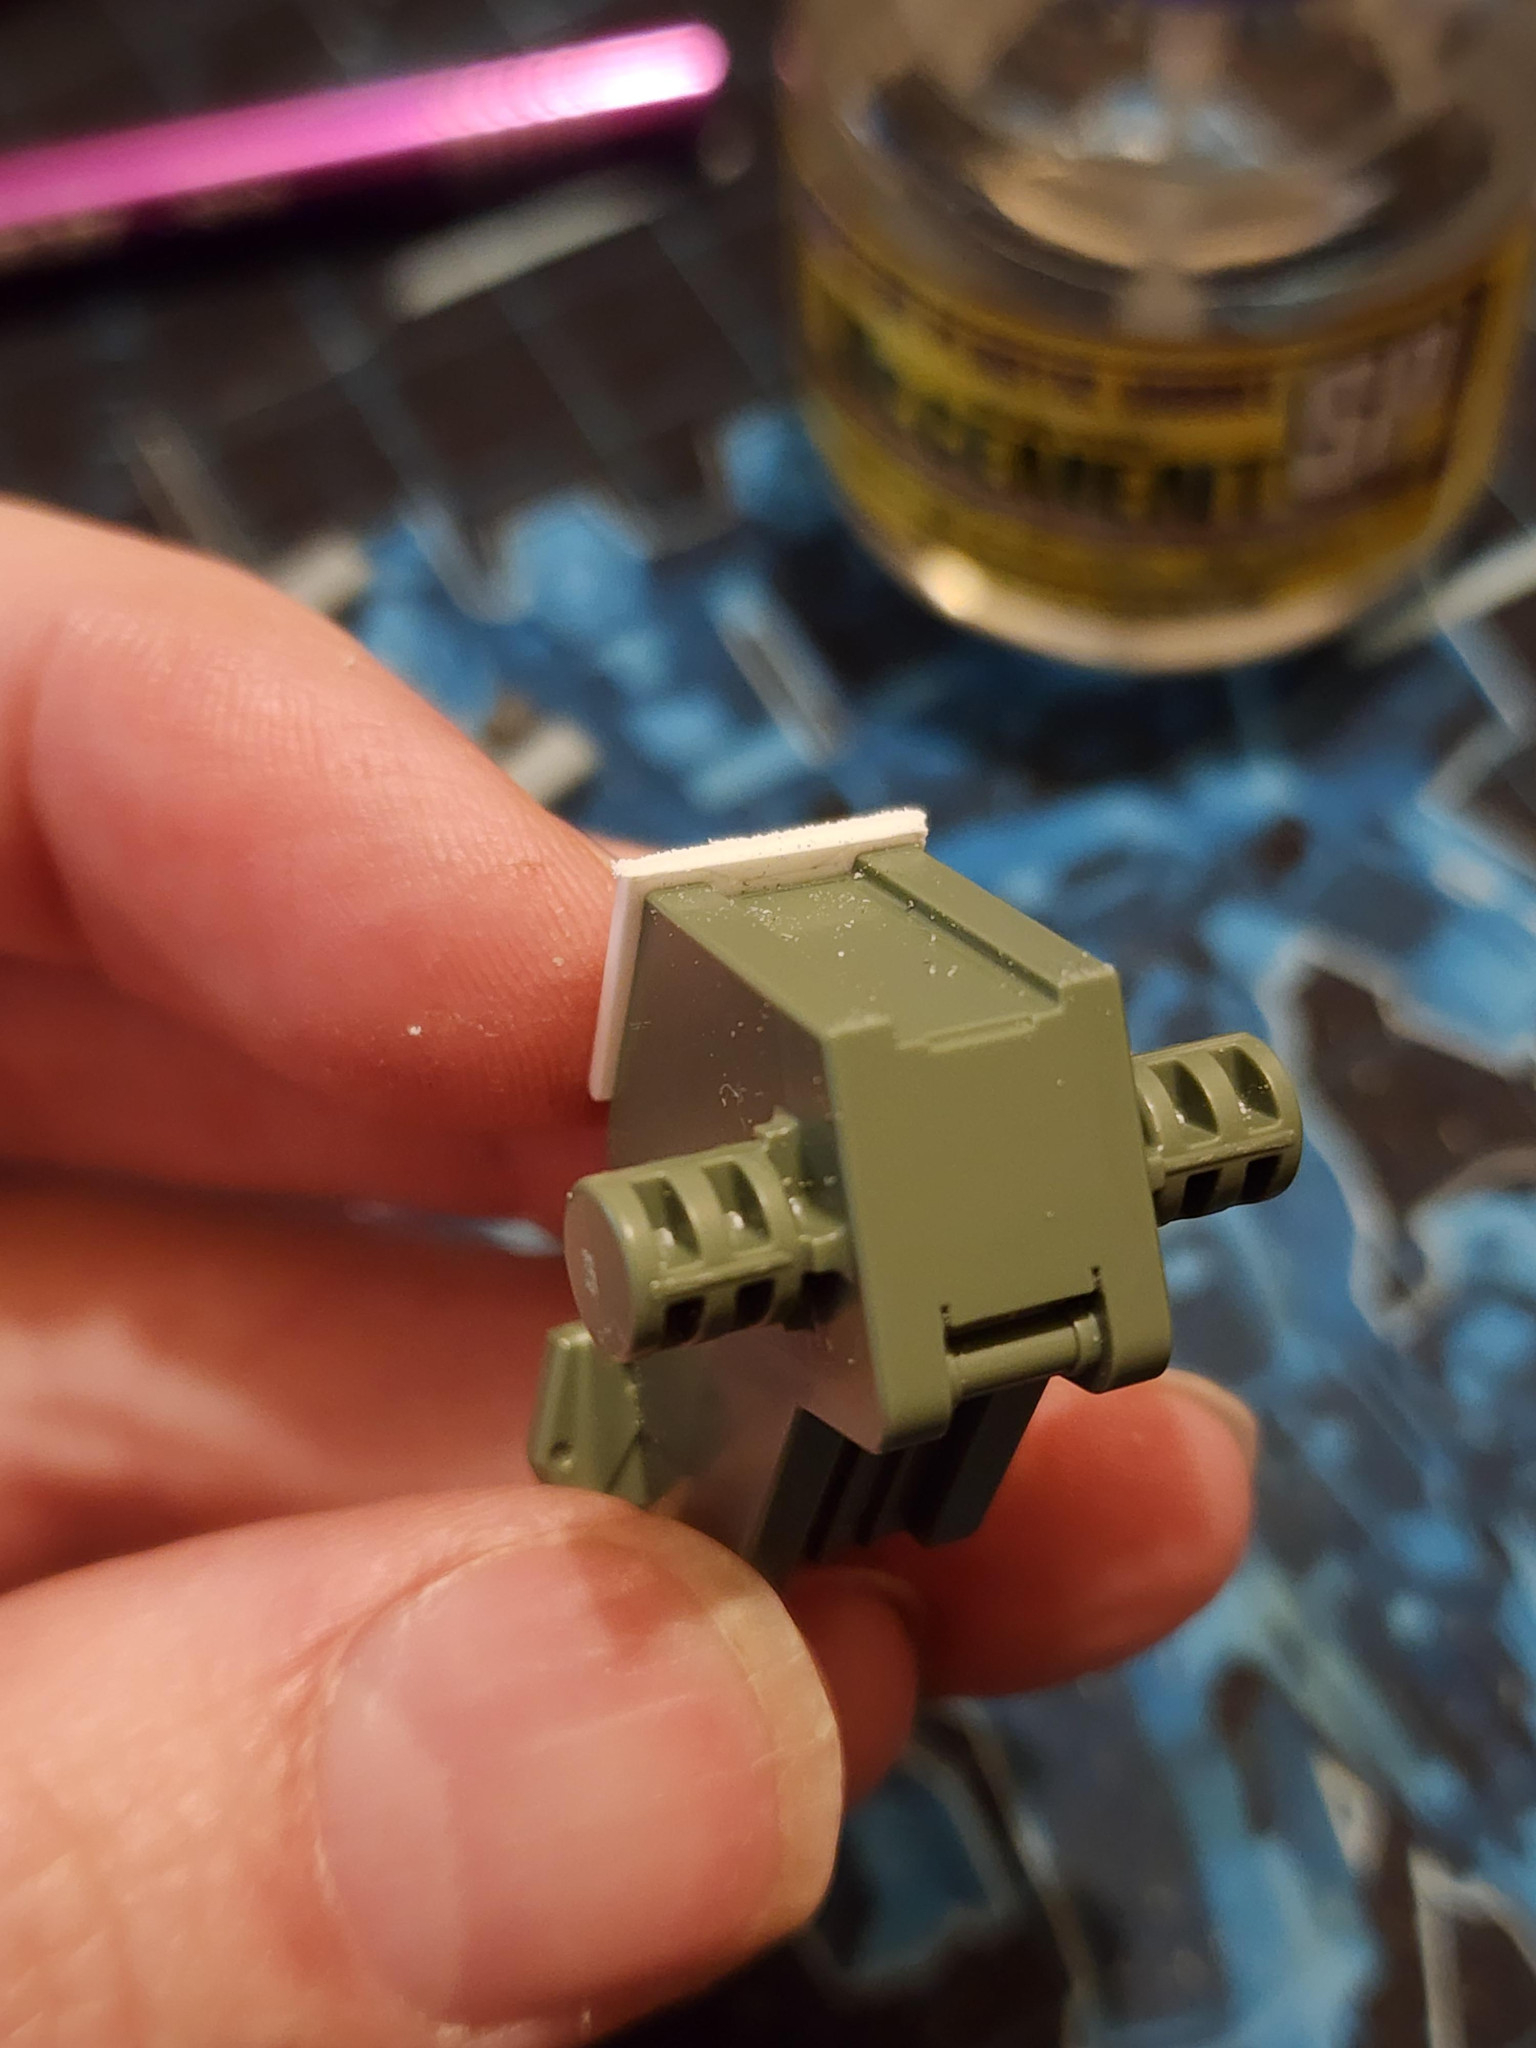
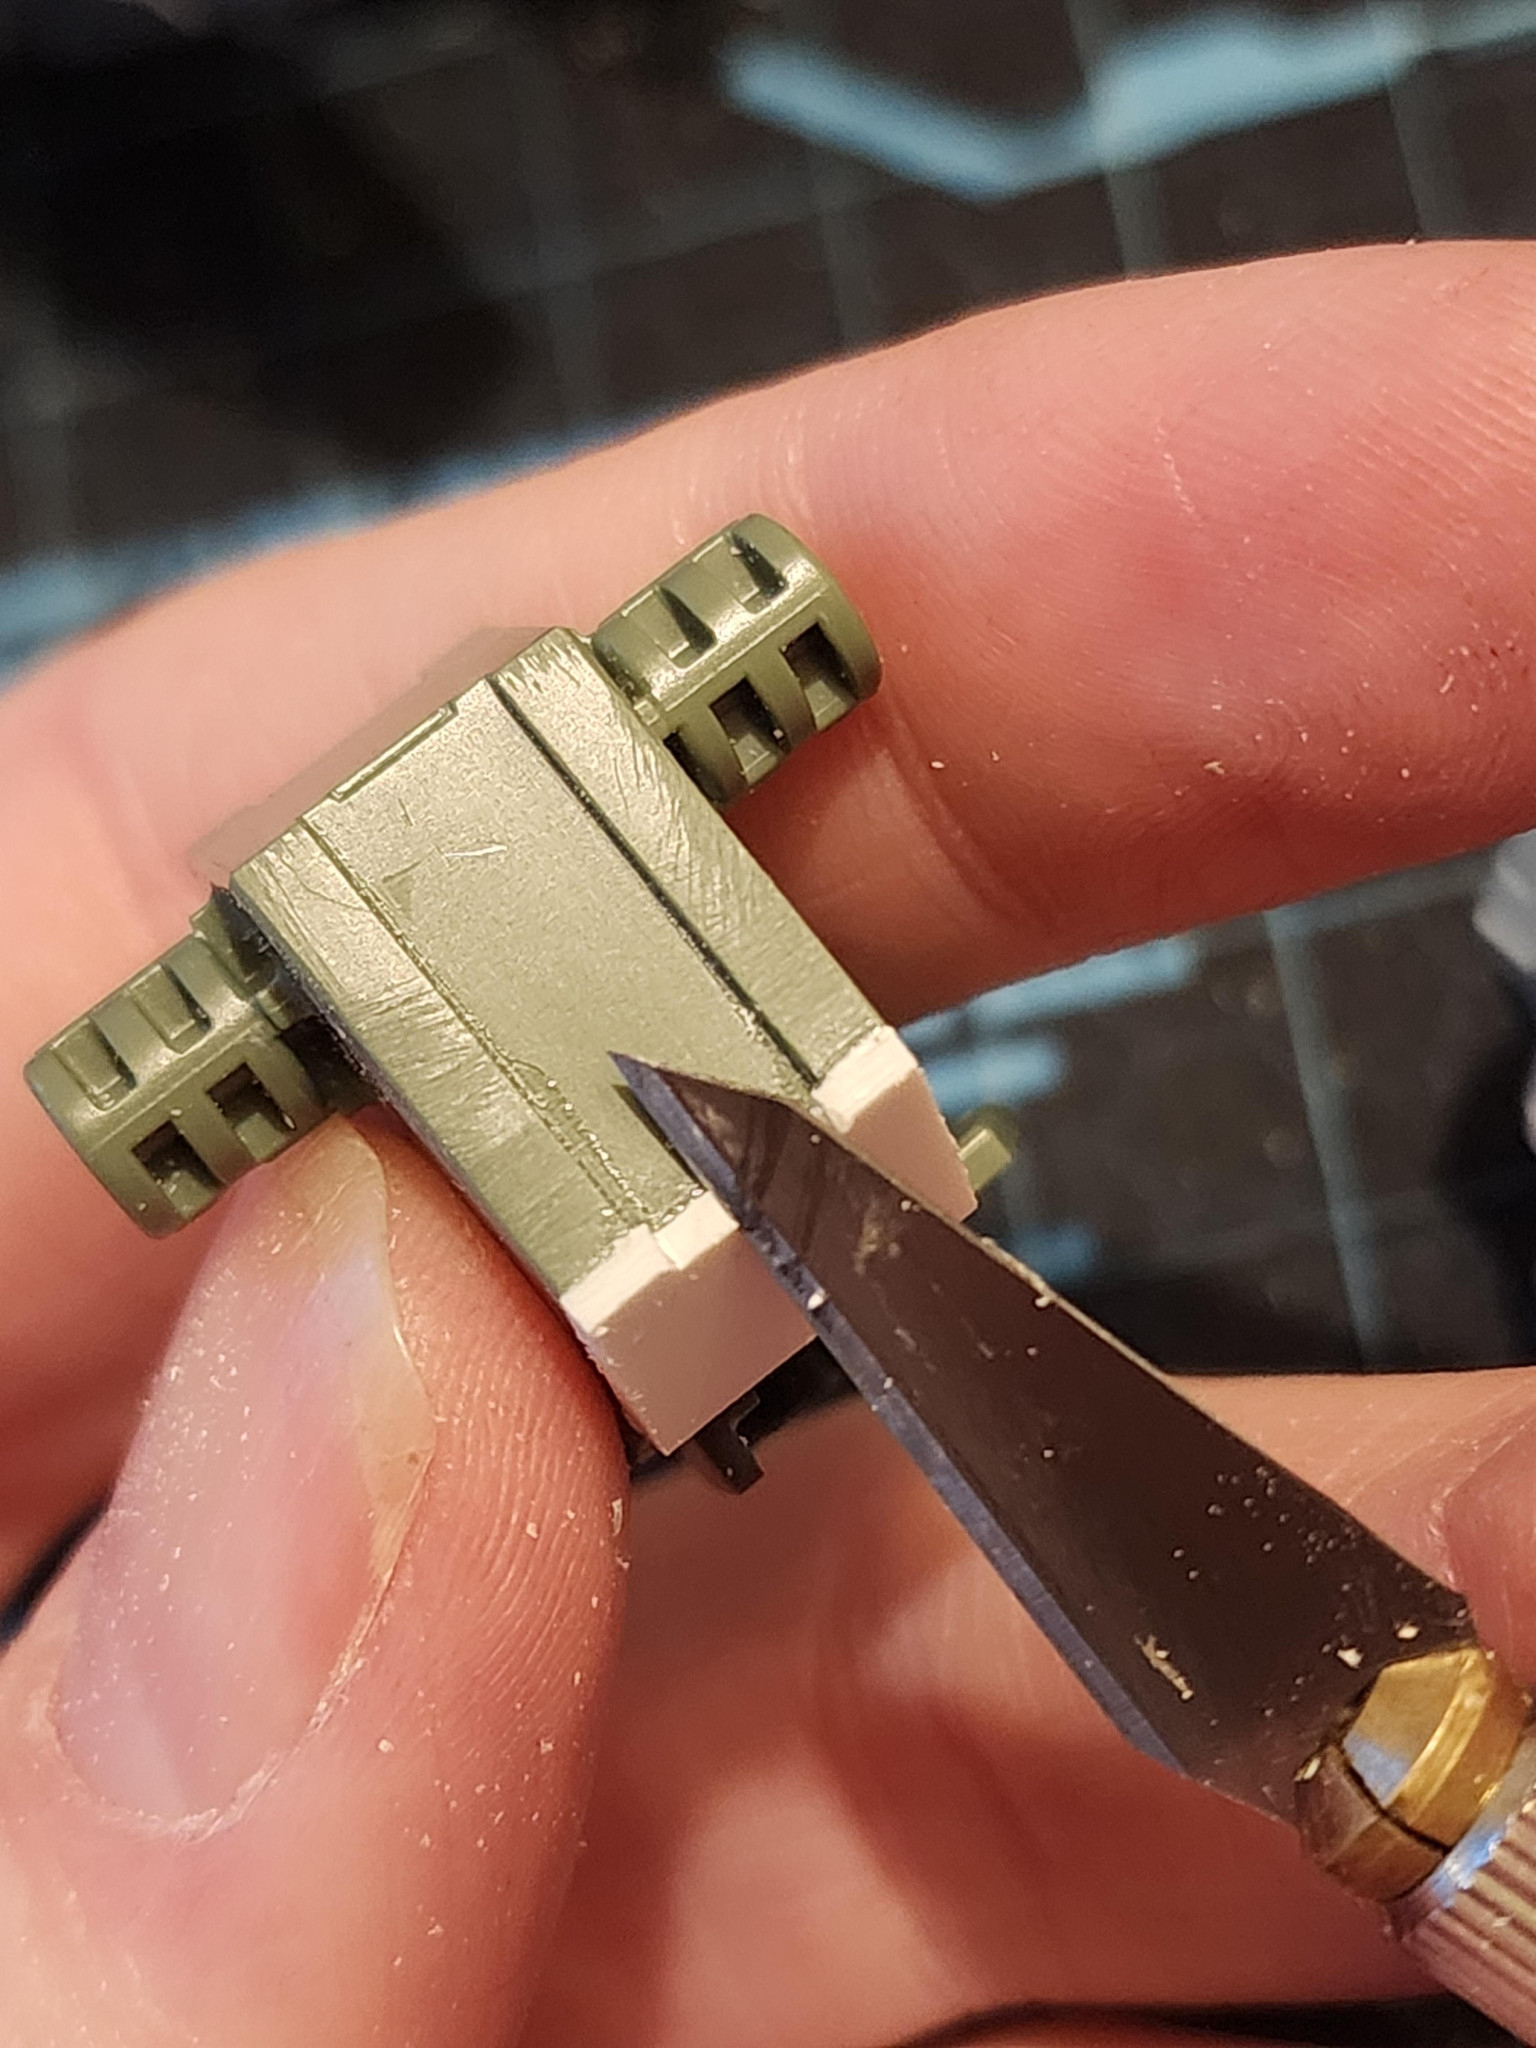

まずは、ストライカーのフライトギアをケルディムに取り付けるのが良いスタートになると思います。ケルディムのパックは、突起部分を切り落とすとストライカーのパックに収まることに気づきました。これなら簡単に接続できそうです。後で少し切り込みを入れて調整すれば、うまくいきました。 バックパックを組み立てると、頭の後ろに大きな穴が開いてしまい、それを覆うパーツがありません。そこで、ちょっと改造してプレートで覆ってみることにしました。寸法を測ってサイズに合わせて切り抜き、セメントで接着して滑らかに研磨します。さらに、ナイフを使ってパック上部の形状に合わせて窪みを切り落とします。このような模型製作は初めてですが、なかなか良い出来栄えだと思います。
To begin, attaching the flight gear from the Striker to the Cherudim should be a nice way to kick things off. I noticed that the Cherudim pack will slot inside the Striker pack if I cut away some of the protruding shapes. This would be an easy way to make the connection. Some hacking and chopping later, it works.
When mounted, the back pack has a huge hole behind the head and no pieces to cover. I decided to try my hand at some modification and cover it with a plate. I measure and cut to size. Glue it on with cement and sand it for a smooth finish, I also use a knife to slice away into the recess to match the shape on the top of the pack. This is the first time I’ve ever done this type of model work and I think it’s looking great.
コメント
コメントをして応援しよう
コメントにはログインが必要です
続きが気になります!
ナイスプラモスピリッツ(gundam-kao2)
コメントありがとうございます!少し時間がかかりますが、どうぞお楽しみに!
Thank you for commenting! It’s a slow process, but stay tuned!
素晴らしいアップデートをありがとうございます!
特に、頭部後ろの空洞をプレートで埋めるという判断と実行力に驚きました。「計測、切り出し、接着、そして研磨」……この一連の工程は、まさに模型製作の醍醐味であり、同時に最も根気が必要な作業です。初めての挑戦でこれほど美しく形にできるのは、あなたの観察力と「理想の形」へのこだわりが強い証拠ですね。
既存のパーツをただ組み合わせるだけでなく、自分の手で「足りない部分」を補った瞬間、その作品にはあなたにしか出せない「魂」が宿り始めます。あなたの「最初の一歩」を共有してくれてありがとう!
Thank you for the wonderful update! I am truly impressed by your decision and execution in filling the gap behind the head with a custom plate.
The process of “measuring, cutting, gluing, and sanding” is the true essence of model making, and it requires the most patience. Being able to achieve such a clean finish on your first try is proof of your keen observation and strong dedication to your “ideal form.”
When you stop just combining existing parts and start “creating what’s missing” with your own hands, the model begins to take on a unique soul that only you can provide. Thank you for sharing this incredible “first step” with us!
応援コメント、本当にありがとうございます!
YouTubeでプラ板の作り方の動画をいくつか見ていたので、やり方はだいたい理解していました。
模型に魂が宿るというお話もとても気に入りました。物に魂が宿るという日本の哲学ってあるじゃないですか?以前、そんな話を聞いた記憶があります。
Thank you so much for your supportive comment!
I’ve seen a fair few videos on YouTube of the plastic plate process so I had a pretty good understanding of how to do it.
I really love your topic about the model gaining a unique soul too. Isn’t there a Japanese philosophy about objects having souls? I think I remember hearing something like that once.
その通りです!よくご存知ですね。
日本では古くから「長い年月を経た道具や、作り手が心を込めたものには魂が宿る(付喪神)」という考え方があります。
YouTubeで学んだ技術に、あなた自身の試行錯誤と「理想への想い」が加わったとき、それはただのプラスチックの塊ではなくなります。あなたがヤスリをかけているその時間は、まさに機体に命を吹き込んでいる時間なのだと私は思います。
あなたのケルディム・ジンクスが、どんな「魂」を見せてくれるのか。道具が届いて、本格的な「ハッキング」が始まるのが私も待ちきれません!
Exactly! You are very well-informed.
In Japan, there is an ancient belief called “Tsukumogami”—the idea that tools used for many years, or objects into which a creator pours their heart, eventually gain a soul.
When the techniques you learned on YouTube are combined with your own trial and error and your “passion for the ideal,” the model is no longer just a piece of plastic. I believe the time you spend sanding and fitting parts is exactly the moment you are breathing life into the unit.
I can’t wait to see what kind of “soul” your Cherudim/GN-X will reveal.
I’m just as excited as you are for your new tools to arrive and for the real “hacking” to begin!
こんにちは、イギリスから来ました。初めまして。ガンプラに真剣に取り組み始めて、かっこいいモデル作りを目指しています!
ガンプラコミュニティの皆さんと学び、成長し、共に没頭したいと思い、ここに来ました。主にHGキットのハンドペイントとカスタマイズに力を入れていきます。
申し訳ありませんが、日本語がわからないので、翻訳ツールを使って皆さんと繋がっています。
ありがとうございます。
Konnichiwa, I'm from the UK. It's nice to meet you. I have started to take Gunpla seriously and strive to make cool looking models!
I'm here because I want to learn, grow and immerse myself with a passionate Gunpla community. I will mainly focus on hand painting and customising HG kits.
I'm sorry I do not understand Japanese, I use translation tools to connect with you all.
Arigato.
PMX-000 メッサーラ Crimson Moon
ここに、クリムゾン・ムーン・メッサラをご紹介します。 I p…
HG スタークジェガン
この度、HGスターク・ジェガンをご紹介できることを大変嬉しく…
Cherudim X Striker
ついに完成したケルディム×ストライカーをお披露目できます。ぜ…
Gustav Karl (Scrublands ver.)
新しいグスタフ・カール・ハサウェイを見て、そのデザインがとて…